TRAIL CAMERA STRATEGIES (Tips and tricks for improved success)
How to hide your cameras, best locations, and general recommendations
HABITAT IMPROVEMENTHUNTING STRATEGIES
Owen Brick
1/21/2025
In this article, I will discuss important trial cam strategies that will help you find success.
It is no question that trail cameras are a phenomenal tool that allows us hunters to learn and understand the actions of the deer in a given area. The intel they provide can be critical to learning specific patterns, especially those of mature bucks. Needless to say, if you don’t have trail cameras on your land, you are missing out. There are many reasons to run trail cameras, but in this article I am going to discuss some placement principles and set up strategies.
Before that however, it is important to make clear that TRAIL CAMERAS DON'T SPOOK DEER, PEOPLE SPOOK DEER. Don’t ever let anyone trick you into thinking that the trail camera itself spooks deer because that is simply incorrect. How we set up and use the camera will determine whether or not it spooks deer.
If you fail to set up your cameras properly, then you might spook deer. If not addressed, the red infrared bulbs, clicking noise, and shape of the camera can spook deer. Buying a higher end camera that has low glow or no glow will resolve the red bulb issue and most new cameras are almost completely silent. The shape however, is up to us as hunters to hide. Some may think that the box of a trail camera does not spook deer. While that might be the case for does, fawns, and young bucks, it definitely is not the case for mature bucks. In fantasy land states, mature bucks likely won’t mind. But anywhere with significant hunting pressure, they will mind. They might not run, but if they see the red bulbs or shape of a box, they don’t like it because it is simply unnatural. Depending on the buck, he may even avoid the area after encountering a camera that is set up incorrectly. Luckily for us, we can avoid all of these issues with proper set up techniques. So let's go over some set up tactics.
HIDDEN:
The first concept that every trail camera user needs to implement is placing the camera above the deer's line of sight. In most cases, 6ft or so will do the trick. This way, when a deer is passing in front of your camera, they won't see it unless they look up. Deer generally have no reason to look up because they do not have any natural predators above their eye level.
If you are getting numerous pictures of deer looking at your cameras or coming up to sniff it, particularly during the night, then you need to move your camera - it’s simply not hidden enough. When you hide your cameras and have them above deer level, you will find that deer never, or next to never, look at your cameras. This is the case even with infrared bulbs.
In some instances, although quite rare, it can be difficult to get a camera above deer level. In this case, your next best option is to go below deer level. This is nowhere near my favorite method, but it can work if needed. Anything is better than waist high where every deer that walks by will see it.
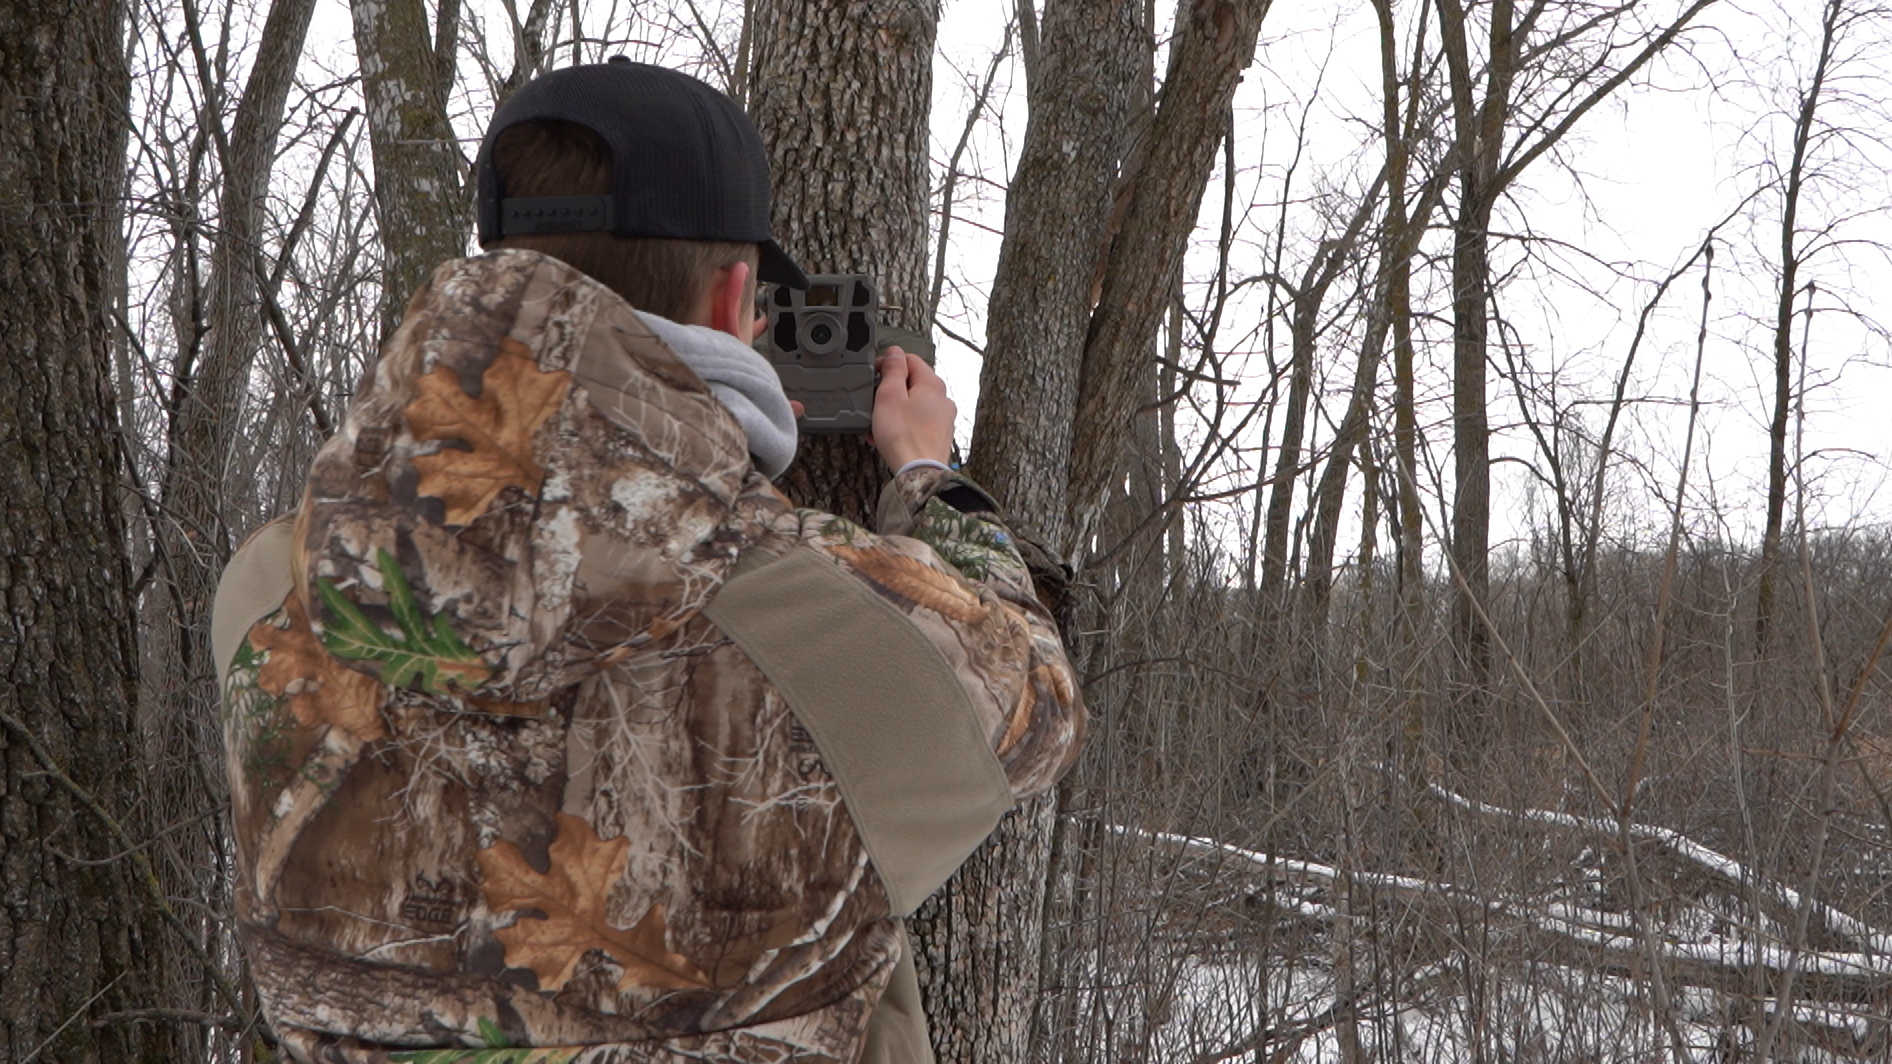
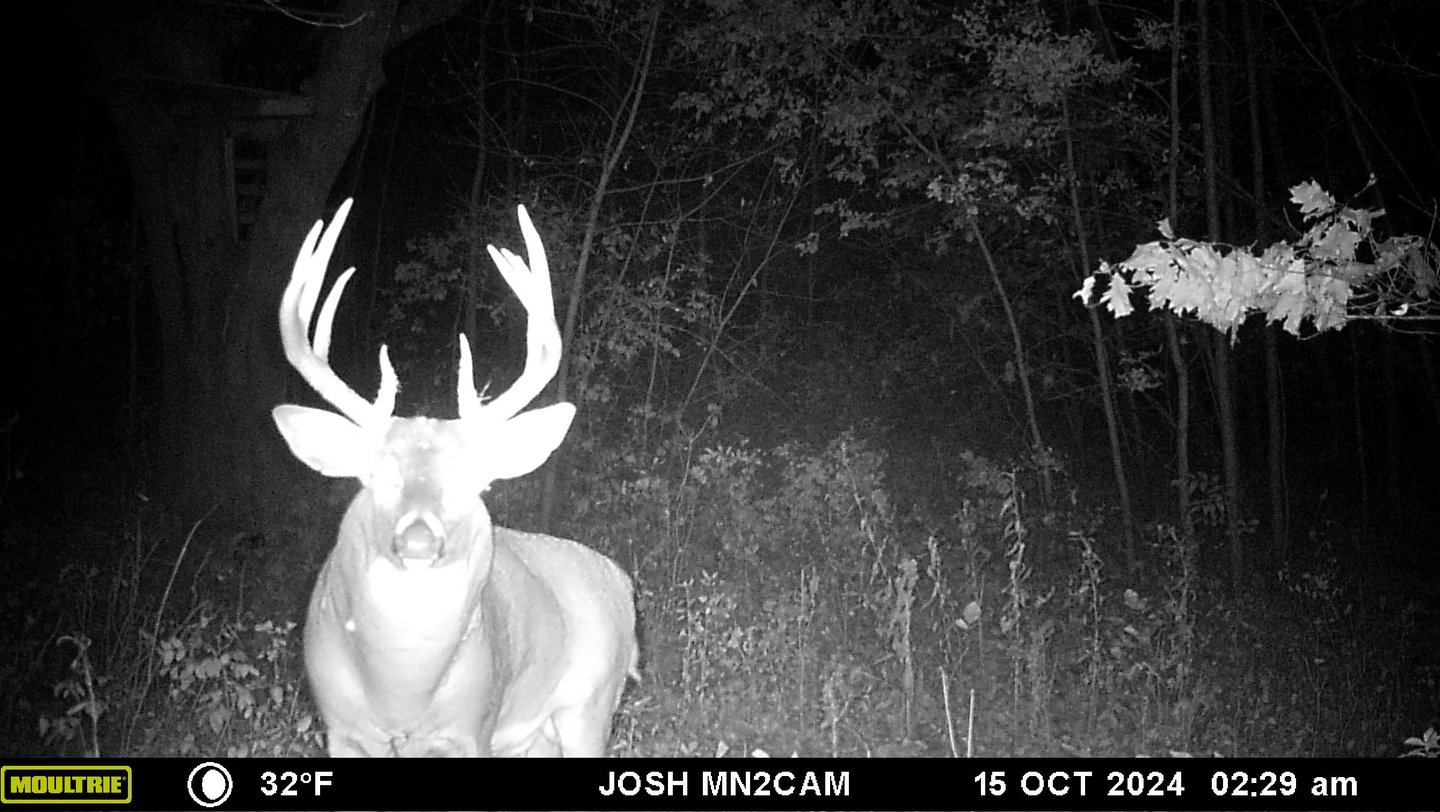
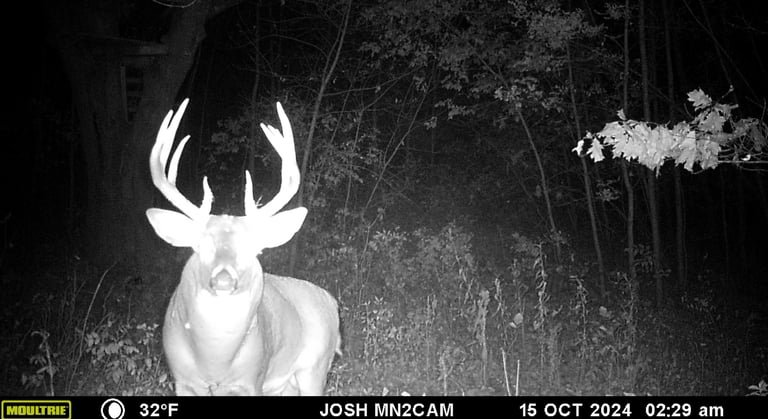
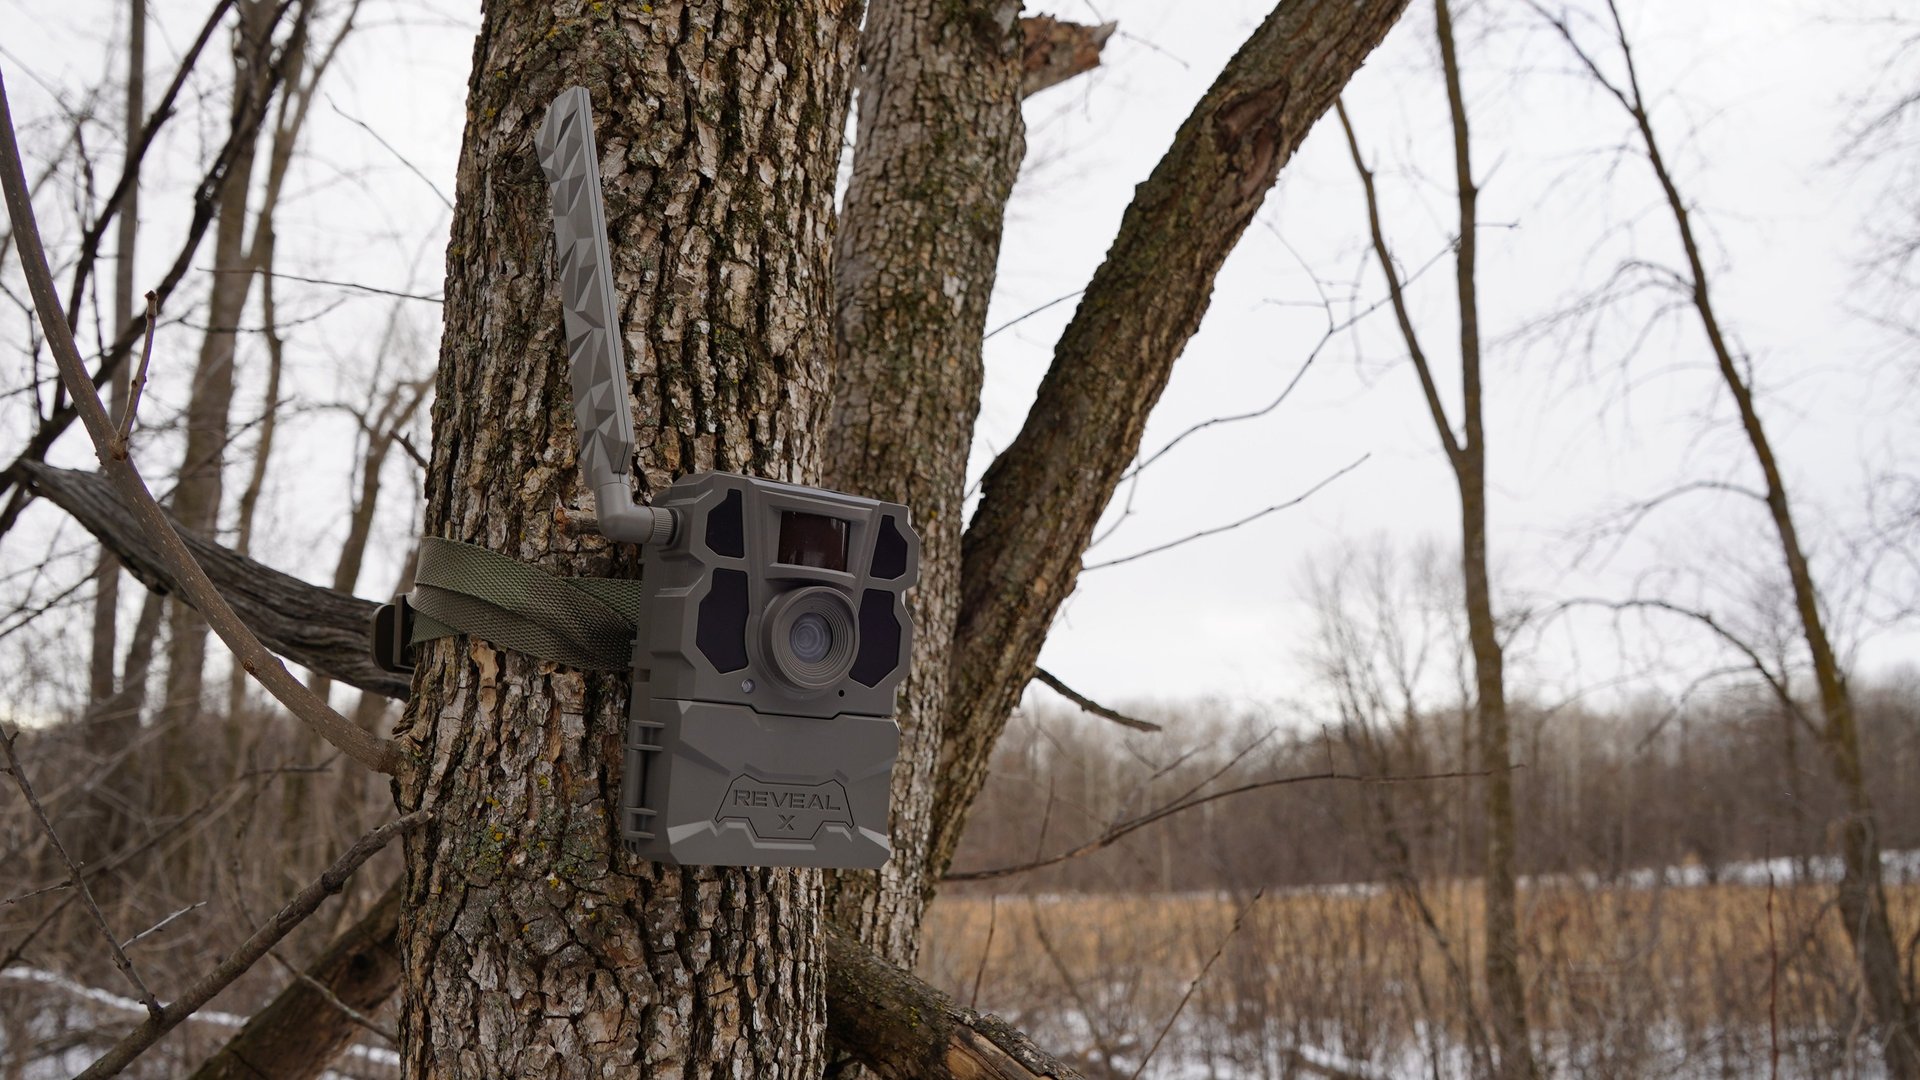
Here is an example of what you don't want to see:
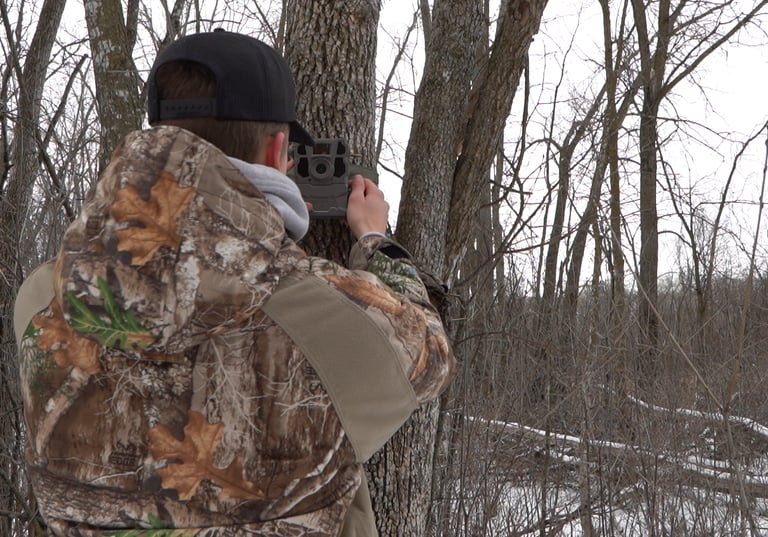
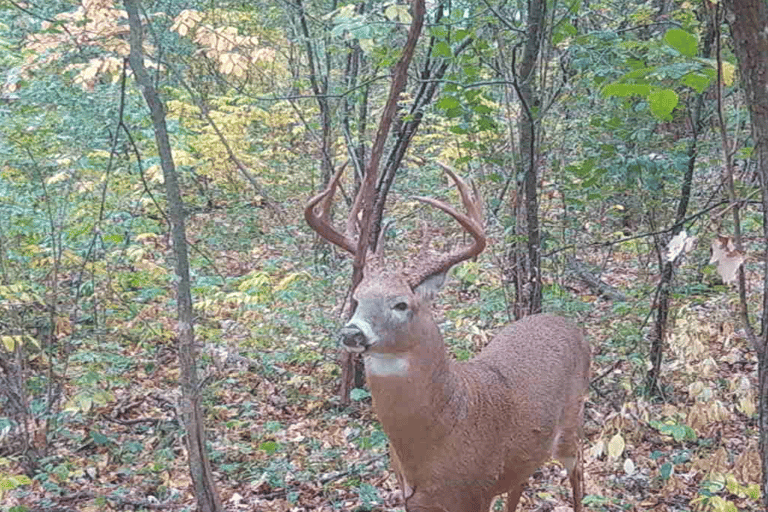
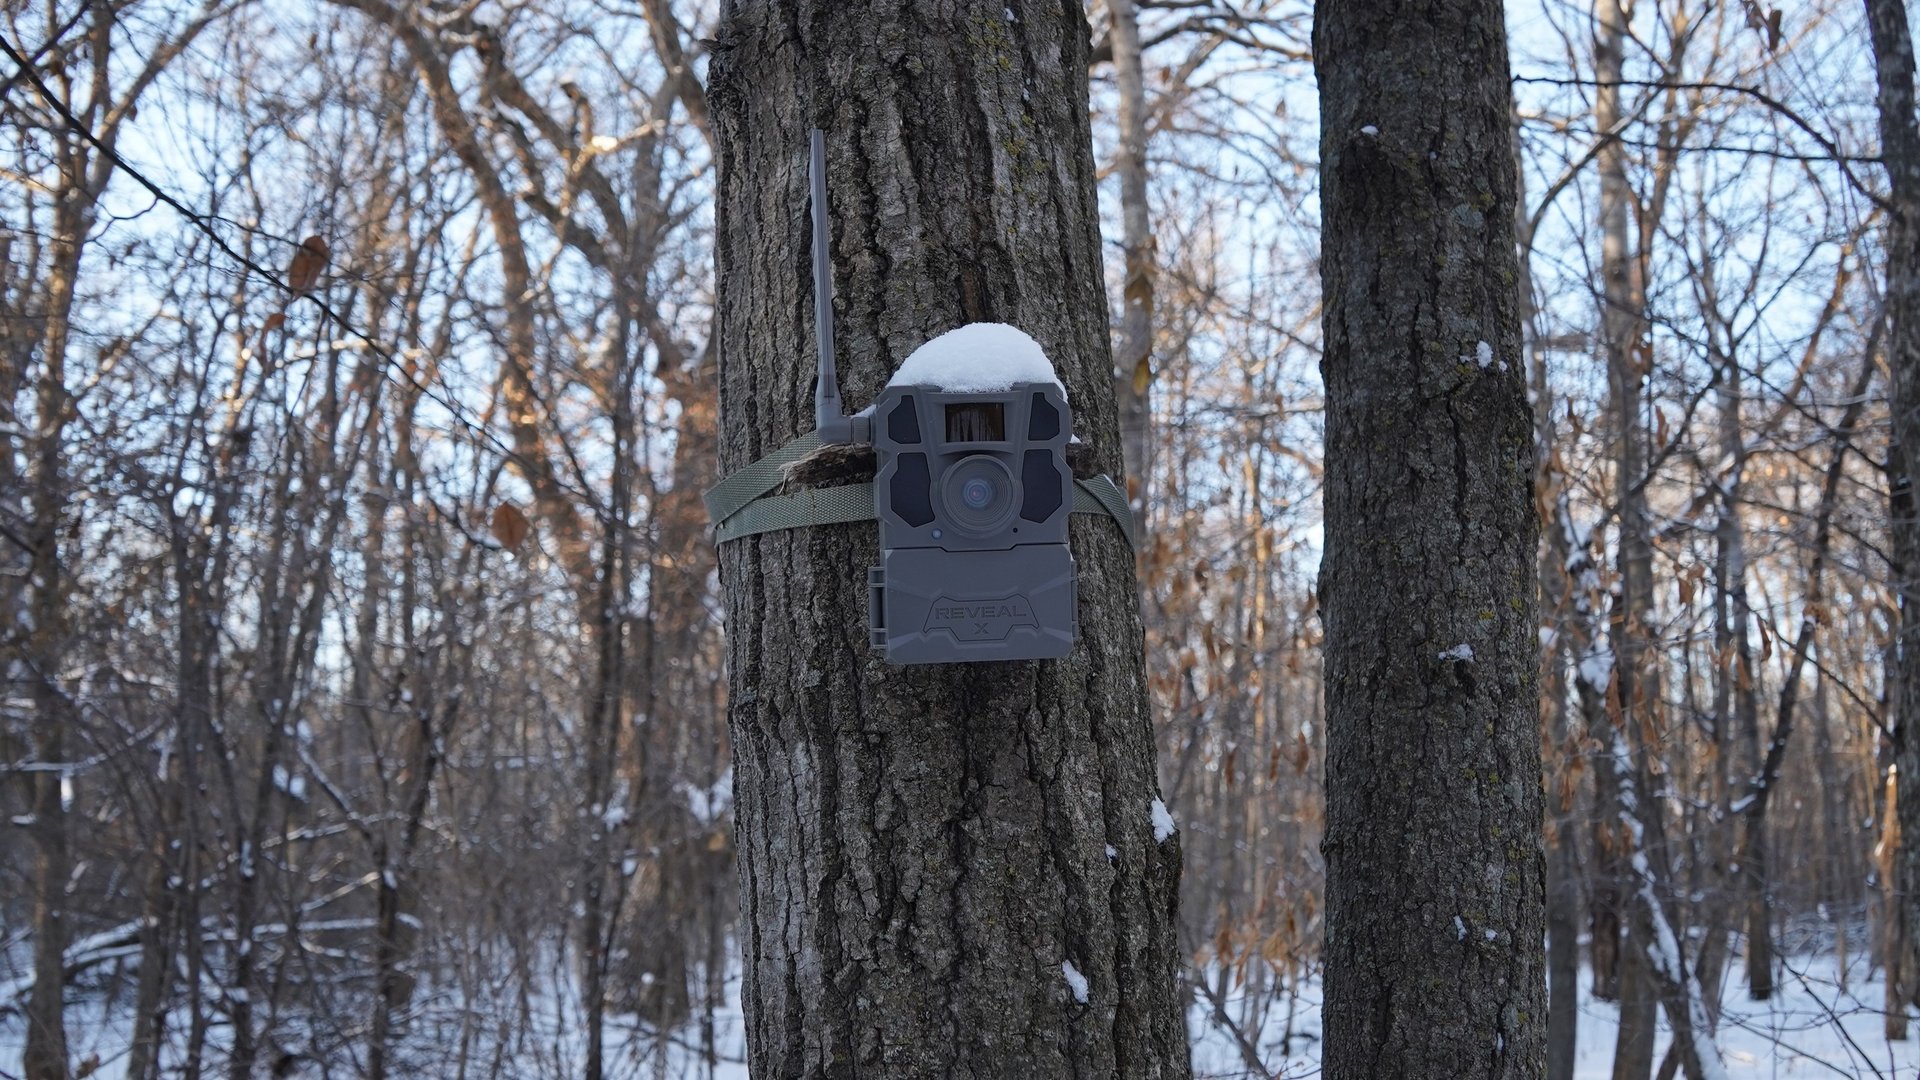
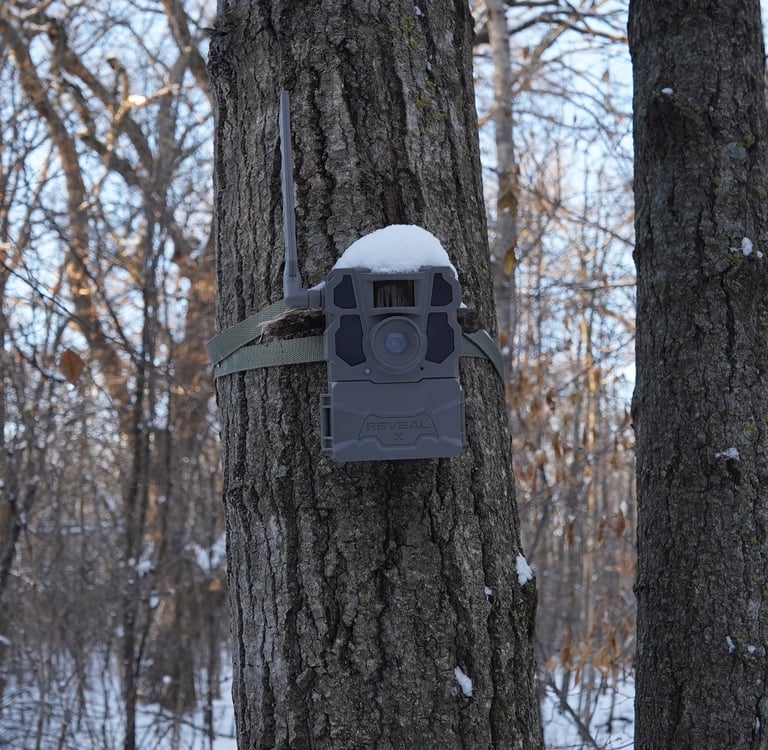
In this next example, the camera is only about 5 feet away from the trail, yet deer will never look at the camera since it is hidden and above their level.
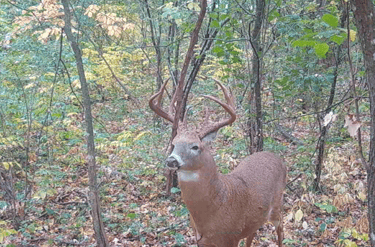
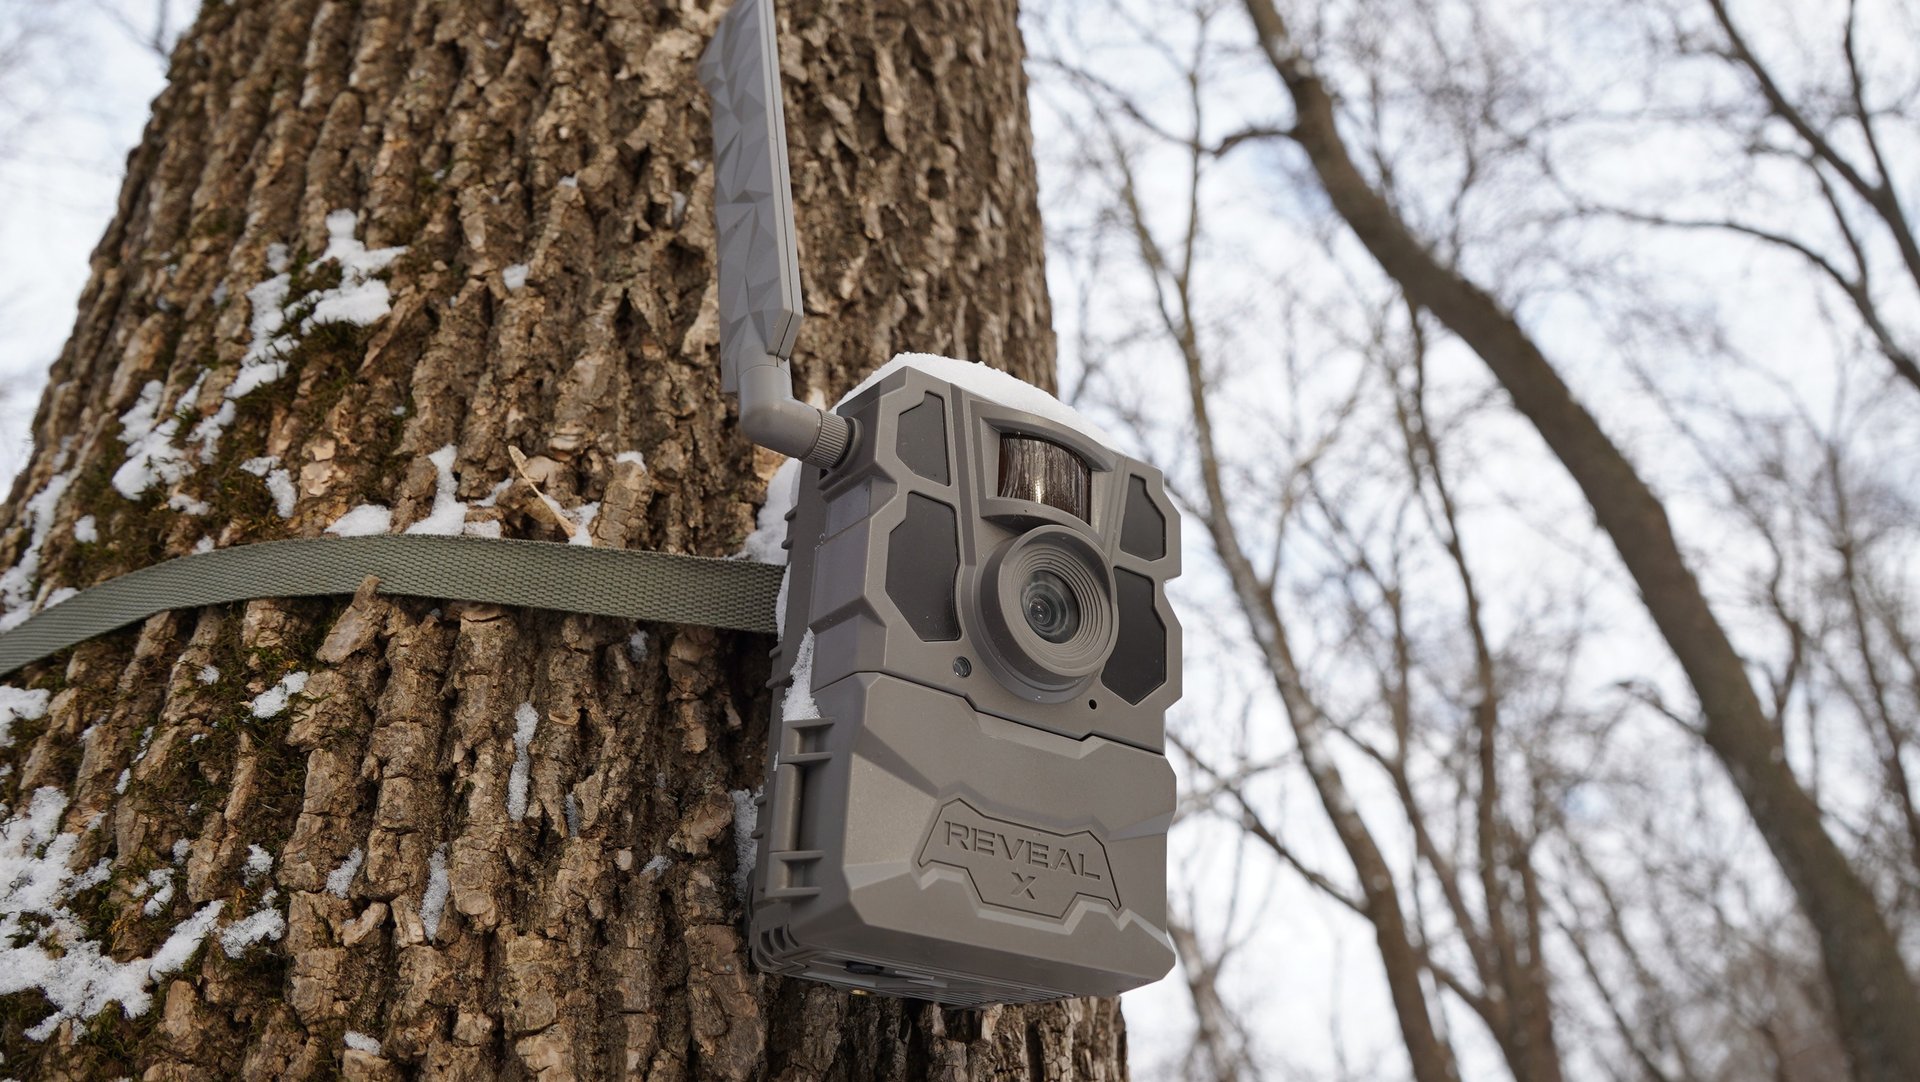
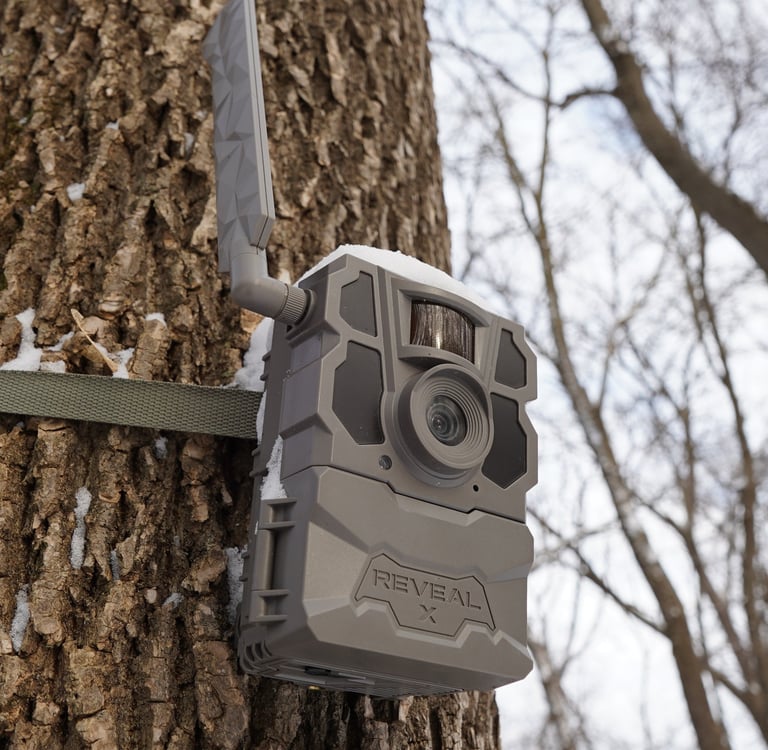
Along with placing your cameras above deer level, it is important to hide the figure of the camera from the tree. You can accomplish this through a couple methods. First off, I always recommend you have the camera on a tree that is wider than the width of the camera. This way, if a deer were to see it, the box won't stick out as much, especially if they see it from an angle. It is also helpful to hide the camera with limbs and branches in the background, as shown in this picture.

In addition, hiding the strap of the camera is beneficial as well. Since it is a monotone color and not the same shade as the tree, it will stick out to the deer because it is unnatural. Wrapping it in the same spot on the tree and tucking it behind will limit the contrast. Just be sure that you don't have the excess tail flopping in the wind.
Since applying these fundamental set up principles, I haven't had a deer be spooked or even look at any of my many trail cameras throughout the years. I guarantee that if you follow these guidelines, you too will find success hiding trail cameras.
Now that you know how to hide your camera, I will go over a couple tips about trail camera location. An in depth analysis will be saved for a later article, because there is much to talk about.
It is essential to position your trail cameras in three different locations. Although it may seem obvious to some, I find that many hunters don't even place their cameras near their stand location. If this is you, you are missing out on the valuable insight that comes from having your cameras near your stand locations. Remember, trail cameras do not lie if they are placed in the right spot. In a short summary, here are my three favorite spots.
Food:
Having a camera capturing the activity and use of your food source is critical. In the case of private land, it will give you an accurate depiction of when and how many deer are using your food plots, along with providing insight to your target buck's tendencies. I recommend setting up your camera in the corner of the food plot, aligning it so it captures a good view of the entire plot, or at least where the deer will use it most. I also like to add a mock scrape in front of the camera to increase the odds of your target buck coming into camera range. One thing I never recommend and avoid at all cost, is putting your camera on a post and sticking it in the middle of the plot or food source. Back to what we talked about in regards to hiding your cams, a box on a stick in the middle of a food source is going to spook deer. It is simply unnatural. Again, you could get away with it in a fantasy land state, however most hunters should avoid this if possible. There is always a better solution than a fence post. Now if you are using a non cell camera over a food plot, position it on the outside edge closest to access so you can avoid as much intrusion as possible when changing the SD card. Needless to say, the scent you leave behind can have a lasting impact, so it would be best to avoid that. In short, a camera on a food source can be very beneficial, just follow the proper set up tips to find success!
Travel:
Adding a camera over a travel location is a great choice! This could be on a major funnel, bench, saddle, pinch point, man made travel corridor, a heavy trail, and more. When setting up a camera over travel, I always have a mock scrape in the middle of the trail or intersection of trails. Generally, a combination of such factors makes a great bow stand location. If you have water holes on your property, you absolutely should have a camera on them as well.
Bedding:
Setting up a camera near a bedding area is another prime location. It is important that you don't put the camera in the actual bedding area, but rather on the way in and out. This goes for both buck and doe bedding. The intel you receive can give you very valuable insight to where your target buck is spending his daylight hours, and where deer are bedding in general. As with all the other locations, I almost always have a mock scrape in front of the camera.
General Information:
In most situations, I recommend having your cameras on video mode. You will learn far more about your deer herd by using video mode than the brief snapshot in time of a picture. For instance, you can pick up on how comfortable a deer is in the area, posturing and dominance of one buck to another, character traits of bucks, rut activity, access to audio and so much more.
Also, during hunting season, I prefer to use Energizer ultimate lithium batteries. I have found they have the best capability to last throughout the entire season. The settings of your camera is a large determinate of battery duration as well.
Personal Favorite?
Throughout the years, I have run several different trail cameras brands (7 to be exact). Each has their pros and cons, some more pros, some more cons. For the past three seasons, I have been using Tactacam Reveal, simply because they are the best camera on the market in my opinion. I will save all the reasons why for another article. They have been a game changer for me, and if you are looking into purchasing a cell camera, I would recommend Reveal.
Conclusion:
Throughout this article, I have discussed important trail camera set up tips that will help you find success. Hiding your trail cameras is critical and it is easy to do! I guarantee if you apply these principles to your trail camera strategy, you will significantly decrease or completely eliminate the amount of deer that see and are spooked by your cameras. Remember, trail cameras don't spook deer, people spook deer. Also, remember the three optimal locations - food, travel, bedding - and you will find yourself with a large inventory of deer pictures/videos. Trail cameras are extremely beneficial tools, apply these concepts and improve your success today!
Copyright© 2026 WHITETAIL SYSTEMS AND SERVICES, LLC